Install Icon Packs
Apex Home supports custom icon packs to enhance the visual experience. Here's how to install and use icon packs:
Compatibility Notice: Icon Packs are only supported from Apex Home v1.0.1. If you're still running Apex Home v1.0.0 consider upgrading to the latest version.
Installing an Icon Pack
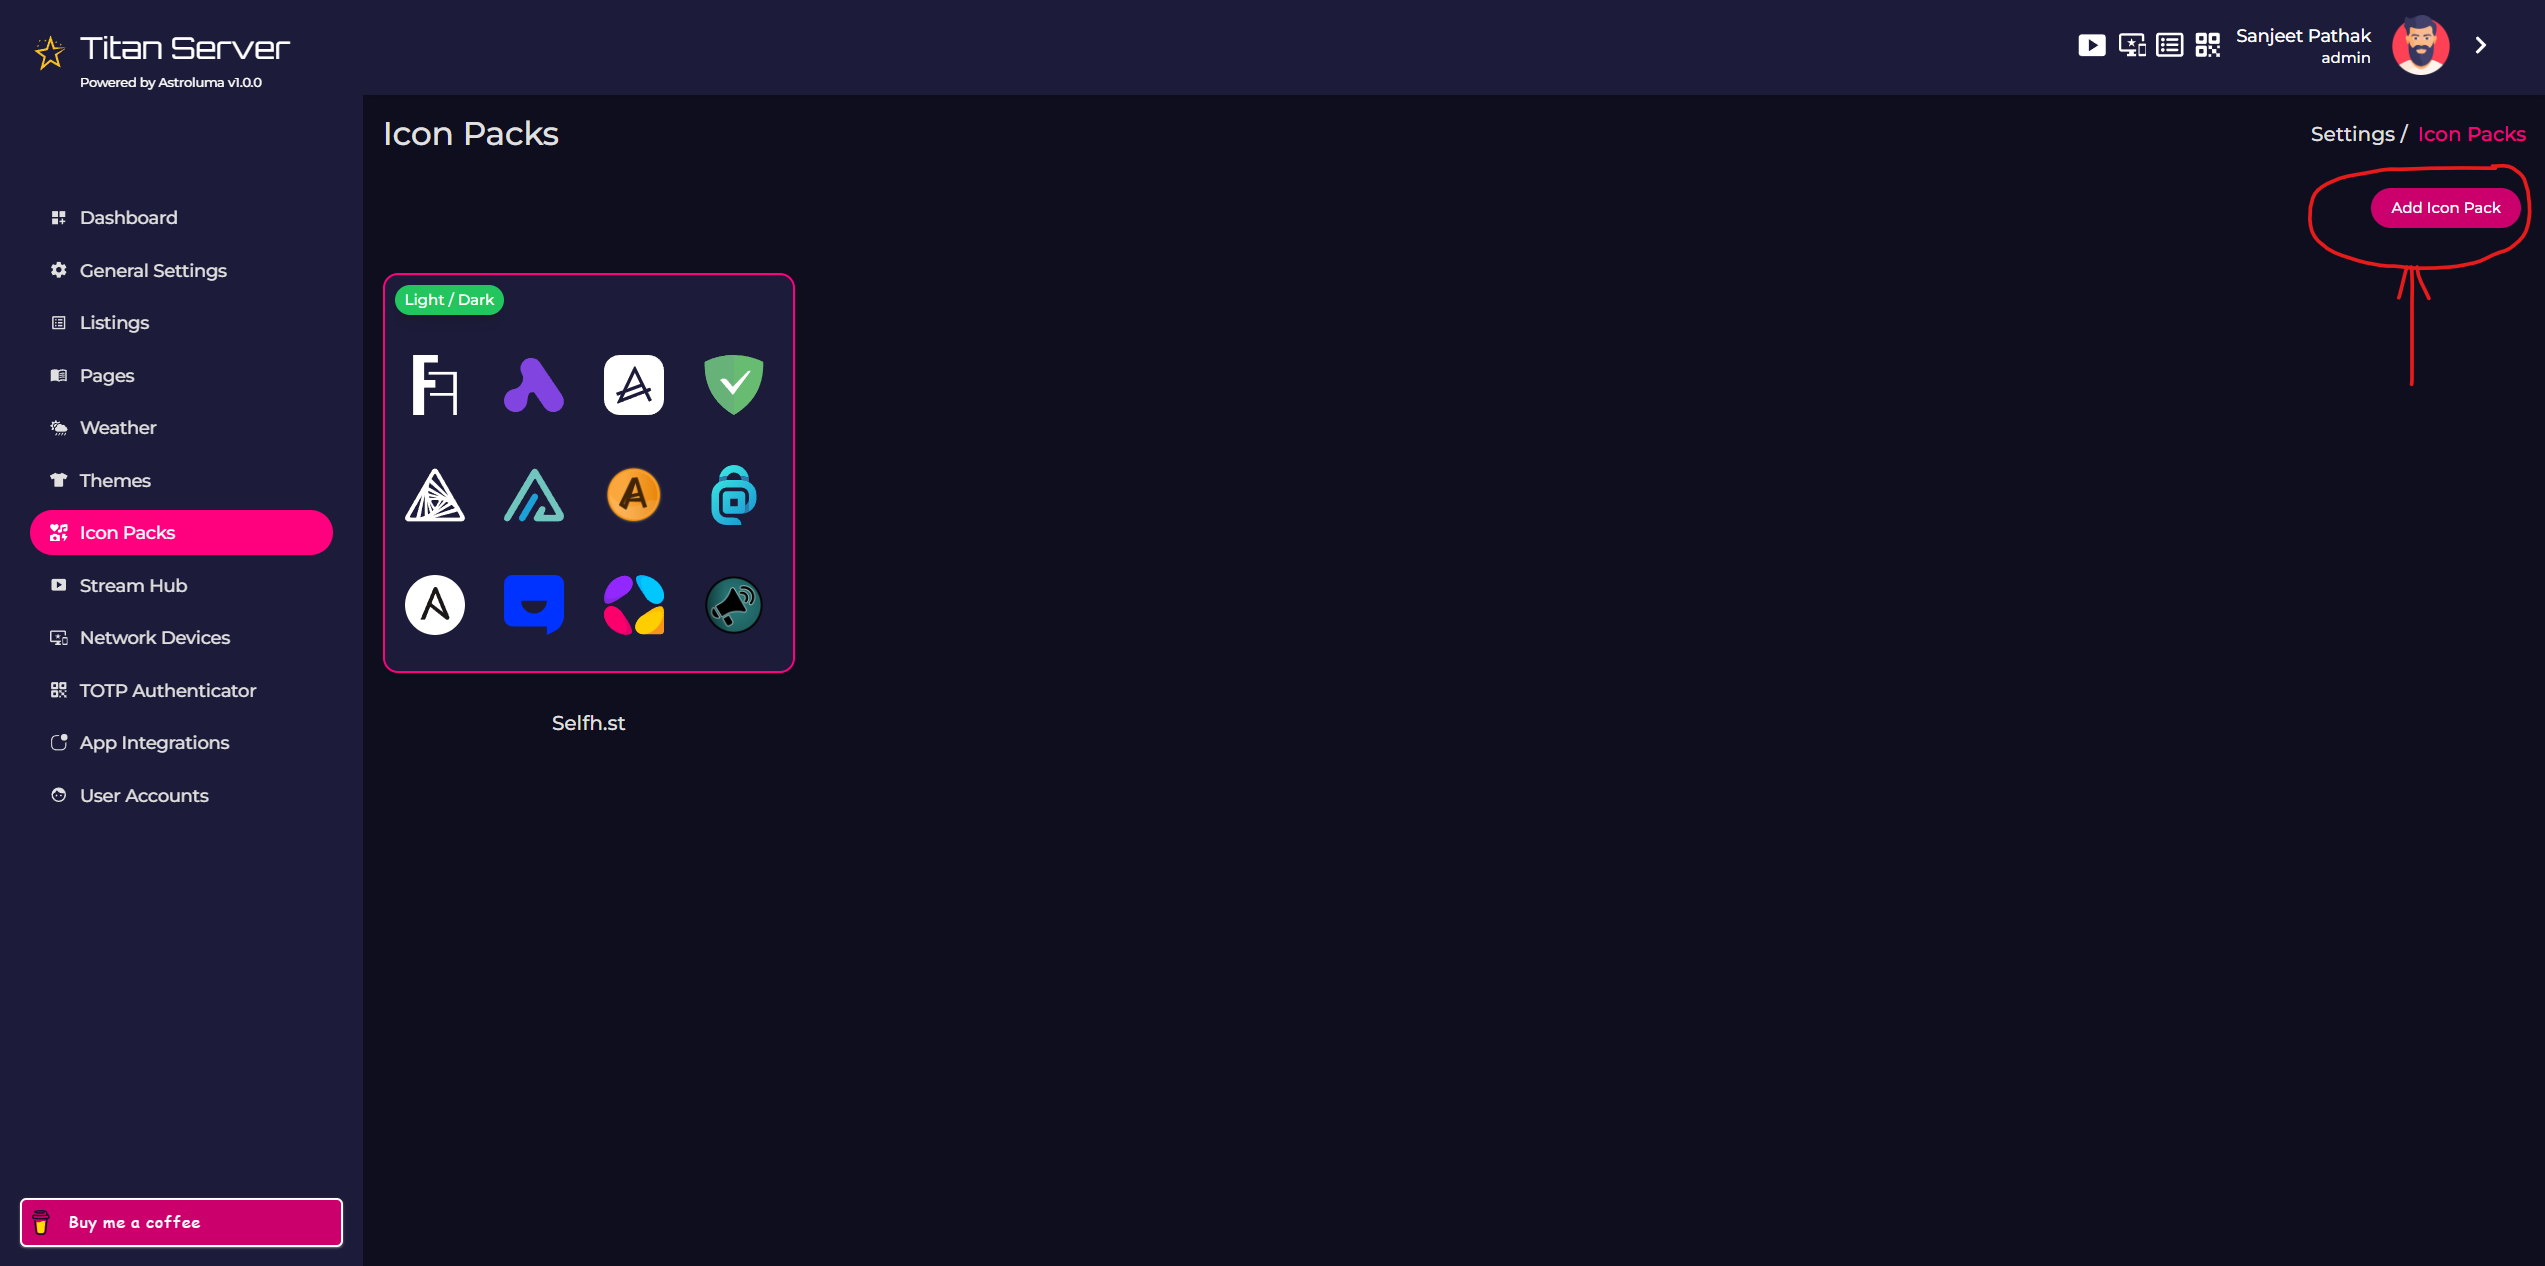
- Navigate to "Settings" > "Icon Packs".
-
Click on the "+" button to add a new icon pack.
-
In the modal, enter the URL of the icon pack JSON file.
![]()
-
Click "Add" to install the icon pack.
-
The icon pack will be downloaded and added to your available icon packs.
Using Icon Packs
-
In the Icon Packs settings page, you'll see a list of all installed icon packs.
-
Click on the icon pack you want to use.
-
The selected icon pack will be immediately applied to your dashboard.
-
Icons will be used for your links, categories, and other elements.
-
You can switch between icon packs at any time by selecting a different one.
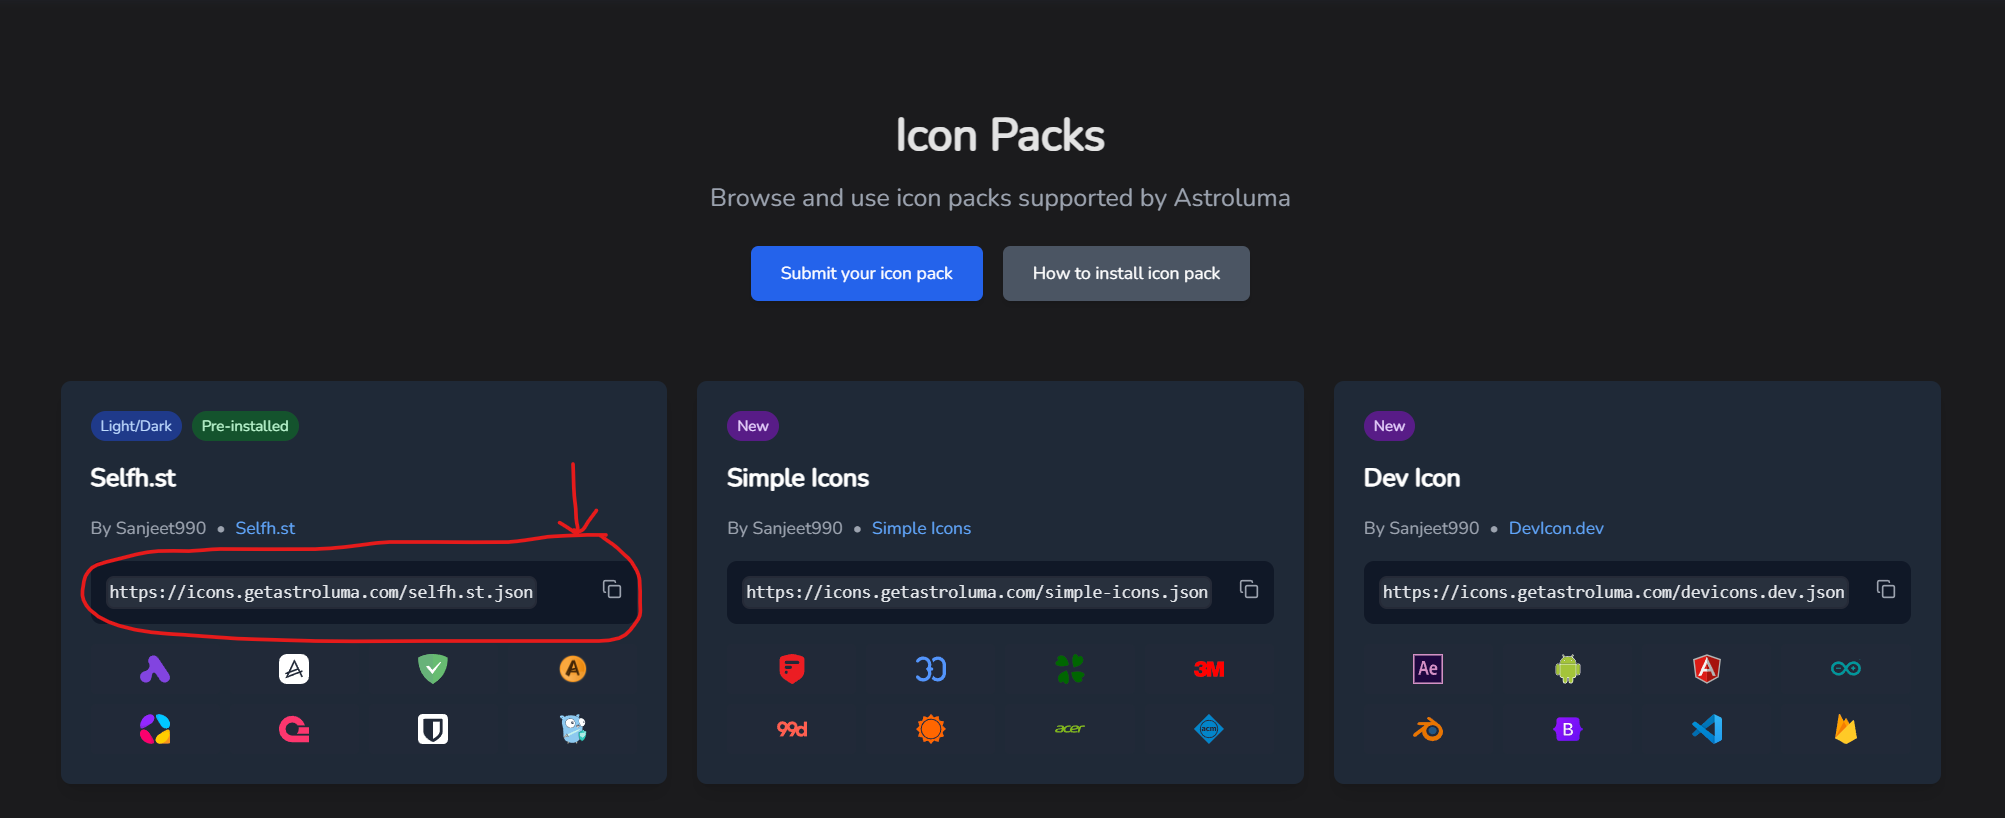
Finding Icon Packs
Finding an icon pack is super easy. Go to the icon's page to Apex Home portal
You should see a list of available icon packs. Browse through them and find the one you want to install:
Multiple Icon Packs: You can install multiple icon packs and switch between them at any time.
Creating Your Own Icon Pack
If you want to create your own icon pack, please refer to the "Create and Submit Icon Pack" section in our documentation.